Sunday, July 22, 2012

Store updates!

We recently took our family vacation for the summer and decided to meander through some quilt shops on the way home.  We visited a few familiar shops and one new shop.  I wanted to follow up on two stores I have previously reviewed.  Simple Sewing Solutions in Lockhart, Tx and All Around the Block (AATB) in Giddings, Tx.

We initially stopped in Lockhart for BBQ because my husband has an unhealthy obsession with Kreuz Market.  Though I don't blame him, that place has delicious BBQ.  We attempted to stop at Simple Sewing Solutions.  I had heard that there was some change, so I wanted to check in out.  Unfortunately, they were closed for lunch.  I wasn't sure how long they were going to be gone, since the sticky note just stated they would be back in 30 minutes.  I did peek in the windows and the gorgeous counter top is gone.  I admit, I am sad to see it go.  It was definitely a piece that made the shop unique.  However, it appears that their fabric collection has greatly increased and let's face it, more fabric makes everything better.  We'll be back in Lockhart sooner, than later.  My husband will need a BBQ fix in a few months, I'm sure of it.  I'll go back by again.

All Around the Block

Next we headed towards Giddings, Tx., which is quickly becoming my quilting Mecca.  It is quite the typical small Texas town.  Old brick downtown.  There is the required BBQ shop there.  But there is nothing typical about the quilt shops in this town.  I understand that there are now 3 shops.  However, these aren't your usual small town quilt shops.  There are more fabric options in the town of Giddings, than in Houston.  I swear on it.  I've visited All Around the Block previously and talked about it here.  My second trip was as successful as my first.  The place still goes on forever.  The selection is incredible.  If AATB doesn't have it, the fabric doesn't exist.  Definitely a must stop, when you're in town.


I picked up a few yards, while at AATB.  The Yo Gabba Gabba! fabric is flannel and for my son.  He is currently at that age and stage where he is absolutely in love with this show.  He recently received his sister's YGG figurines from when she was at the same age.  I foresee myself doing another Yo Gabba Gabba birthday.  The fish material is for a scrub top for my husband.  Scrub tops were how I justified originally purchasing my first sewing machine 6 years ago.  I would make scrub tops and it would save us all sorts of money.  I've made him probably 5 or 6 tops at this point.  I promise you, not a penny has been saved.


This.  THIS!  I bought it for myself.  It is everything I wish I could be.  I have never seen a more beautiful piece of fabric.  It is delicate but incredibly bright and colorful.  It is part of a collection designed by Laura Gunn for Michael Miller called Garden Wall.  There are some other incredible pieces in the collection that I'm dying to get my hands on.  You can see more here.  I have plans for a table runner, I think.  Or a wall hanging to put up in my studio.  I might just sit and stare at it.

While in Giddings, I also stopped at a new to me store, Gerline's.  The shop isn't new at all but it is the first time I've been able to stop by.  I'll give you that information in a few days...


~SLBY

Saturday, July 7, 2012

New listings!!

It has been a while since I've put new items up on Etsy.  I made a few things last summer, then we packed up and moved.  I never got to post them and they have been at the bottom of my to do list.  It would have been more timely to have them up before the 4th of July, given the nature of the pieces.  I love them both for different reasons.  They will be very hard to part with.


The first piece is a patchwork table runner.  I did 3 reverse applique stars on each end.  To give the stars a little poof, I added additional batting under the stars.  You can view more details about this runner here.


The other piece is a flag wall hanging.  This piece was so much fun to make.  You can make this over and over and never replicate it exactly.  There is a ton of detail on this quilt.  The stars were FMQ individually, by me.  There are clouds in the blue area and spirals in the border.  You can see more detailed pictures here.

Enjoy the pieces!  Feel free to ask any questions.

~SLBY

Tuesday, July 3, 2012

Like a kid...

...in a candy store. That's me right now. We are on our way home, literally, from a *VERY* impromptu vacation. We stopped at 3 quilt shops. I love small town shops. Though, really, there is nothing small about them. I find more often than not, there is more selection, personality, and passion in these small town stores, than when I'm in the city. I'll share my purchases, experiences and a few patriotic pieces when we get home. And a new store means another review. I love new to me stores! I'll also update you on two stores that I've reviewed previously but haven't revisited in a while.

See you soon!

~SLBY


 P.S. This is my first experience doing a post from my phone. I apologize in advance, if it looks crazy.

P.S.S.  That did look crazy!  Sorry.

Wednesday, May 30, 2012

School's Out For Summer!!!!

Finally!  We made it!  I mean, my daughter made it.  This household has survived Kindergarten and our first year with a child in full time education.  I know it sounds silly.  Especially if you have older kids that are facing actual life changes like college.  This past school year has been a growing experience for my entire family.  It hasn't been easy but I love the place we are all at now.

I don't have a lot of quilting to talk about in the post.  This is more a State of SewLovedByYou address.  Where I'm headed, what I'm doing, etc.  I like lists, so...


1.  The teacher LOVED her quilt and photobook.  She teared up.  She made me tear up.  I'm so glad it went well.  I'll write a kinda in depth post about the process.  It will help those who told me the Silhouette quilt how to wasn't in depth enough.


2.  Right now my husband is headed back to school.  He is half way through his Bachelor's program.  Between his work and school schedule and having both kids out of their respective school/MDO program, I have decided to stop pressuring myself to do any shows this year.  I have tried a few times but it hasn't happened.  The scheduling puts too much stress on myself and family.  I can't tell you that I'm super excited about this but it's just another 6 months.  


3.  Just because #2 is occurring, doesn't mean that I'm fading away.  Just the opposite.  I've wanted to do more tutorials, share more of my non quilting sewing and just work on some fun projects.  Not that I don't love my custom orders but there is a certain sense of pressure when you are making something and need it to be perfect for someone else.  I want to share my daughter's room make over.  I did lots of sewing for that.  I want to make a few clothing pieces this summer.  I want to make a few art quilts.  I want to take some time to rediscover, refine and strengthen my creative side.  This makes me a lot less sore about #2.


4.  I want to redo this blog.  Badly.  I need to set up and update my photo galleries.  I'm not sure what route I'll take but I dream of having a redesigned and finished site by the time the next school year starts.


5.  I may over share my awesome summer garden.  I apologize for that right now.


6.  I've forgotten the next thing.


7.  Getting old sucks.


8.  I have a few things that I made last year and STILL haven't put on Etsy.  They are 4th of July/Patriotic home decor items.  My goal next week is to get those up on Etsy and the blog for others to see.  


That's it for now.  I hope to see you more this summer.  If you follow me on Facebook, like a post on SLBY's wall, otherwise Facebook thinks you hate me and my posts will stop coming through on your news feed.  


~SLBY

Tuesday, May 22, 2012

The making of a lion...

...well, almost a lion.  It isn't finished yet.


It all started with a very rough drawing.  As do all of my quilts.  I have a whole notebook of quilts made and quilts to be.  I have no clue why but I always have to draw them out first.


Then we traced hands.  22 of them to be exact.  Amazingly, the Kindergartners were all very compliant.  Using the rough drawing, I drew a larger lion onto Wonder Under (WU).  I know, I use that stuff a lot.  I can't help it, it is a quilter's dream.  I traced the hands onto WU too.  This is the head with the hands.


Then, I put it all together.  I made the background from two rectangles.  Then fused the lion one layer at a time.  I ended with the border.  Then it was time to stitch...


I wasn't sure how I was going to add my detail.  What was and wasn't going to get outlined.  Finally, I just went with it.  These things tend to just flow and become more clear, as you go.  I'm really in love with this lion.  He still needs to be bound and washed.  He will soften with a good washing.  

I'll add some pictures, once I'm finished.  The backing is also special but I will share that later.

~SLBY


Tuesday, April 3, 2012

Shabby Chic Pinwheel Quilt


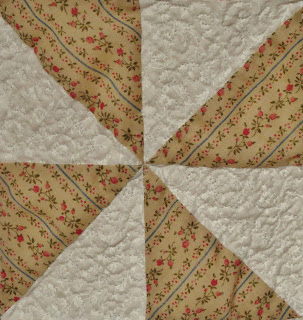
This turned out to be a gorgeous pinwheel quilt.  The colors are so soft and feminine.  I tend to not be a soft and feminine kind of girl.  Creating this quilt helped me find and unleash my soft, girly side.  It is an adult lap size quilt.  Soft pinks and blues were used to create the shabby feel.  Creams helped the pinwheels stand out but kept the colors soft.

I used this method to create the pinwheels.


They came out beautifully.  I decided to FMQ in the white space and leave the colored space untouched.  It really helped the pinwheels to pop.  It created a really nice look on the back.  


I needed to include some eyelet in the quilt and decided to use this flowering eyelet.  It isn't a traditional quilting fabric but that shouldn't ever stop you.  I loved the dimension it added and definitely flowed with the soft, shabby theme.  Always look outside the quilt fabric section for inspiration and never be afraid to try something different.


Having spent most of my life in Texas, there is definitely a slightly country side to me.  The part of me that wants to live far away from others, surrounded by trees and hills, on a sticky warm Texas summer night, quilting away to the sound of chirping crickets and other creatures in the distance.  Some day, I hope.  It is definitely part of our 10 year plan.


~SLBY

Monday, April 2, 2012

Silhouettes!


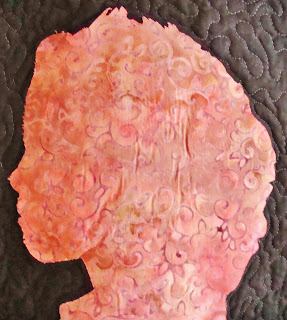
I was given the honor of making two silhouette quilts.  They wanted the quilt to be different than the standard black and white silhouette.  Something that would accent the diversity of the classroom.  They turned out beautifully.  It was a fun and exciting project to work on.


This is going to be a photo heavy posting and I'm going to briefly go over how I constructed them.  This might be a bit dry and technical.


Each black square is about 9 by 9.5 inches.  The silhouettes were sent to me via email.  I went ahead and fit them to a custom sized page in Microsoft Word.  That way, they would all be similar size and would fit in the black squares.  Initially, I had the black squares larger but there was too much empty space.  I traced the heads, backwards, onto Wonder-Under and then fused onto the batik.  I, then, cut the heads out, peeled the paper off, and fused onto the black block.  Each child's name is stitched onto their silhouette, using the letters on my Baby Lock Symphony.  That completed the silhouettes


I also did blocks for the school mascot and class information.  The class information blocks are sent out for embroidery by a local company that I use.  The dragons were done by printing on fabric.  I will share how I did that at a later time.  The dragons were fused in the same manner as the silhouettes.  


The blocks were sashed with 3 inch wide strips of a blue batik.  Then a 6 inch red border finalized the quilt top.


I backed the quilt in black using a wide backing.  FMQ in black and red.  I did some SITD with clear thread on the top.  The quilt was bound in a plum.  When I FMQ around the silhouettes, I didn't want to actually stitch on the heads.  So, I loosely went around them and meandered to fill in the space.  I really enjoyed the effect on the back.


The Wonder-Under did a great job of stick through all the washing and quilting.  A few silhouettes had to be fused on again, however, they reattached with no problem.  I use Wonder-Under for all my applique needs and love it.  

I finished off the quilts with a hanging sleeve using the method found here.  Since I didn't stitch the silhouettes down, this quilt is considered a display quilt.  It just wouldn't hold up, long term, to daily use and multiple washes.  

Let me know if you have any additional questions.  This is something that could be easily made for your child's class.  I have thought about doing one for our family.  I bet the kids would love to have it, when they are grown up with families of their own.


~SLBY